Encrypting Files and Folders on the fly With TrueCrypt Volume Encryption
by DAN CALLOWAY
10 January 2013
WEAVERVILLE, NC – I recently got turned on to an open source application that is cross-platform and extremely secure. The application is called TrueCrypt and is available for download at TrueCrypt’s Homepage. Downloads are available for Windows XP/7/Vista, MacOSX, and Linux.
I’m very familiar with a cross-platform password manager application for Windows, MacOSX, and Linux called KeePassX 0.4.3. I’m running KeePassX on both my Linux Mint 14 Cinnamon and my MS Windows XP platforms. The database that contains all the passwords you use to access various applications and websites on the Internet, including banking, eCommerce, job sites, blogs, web domains, control panels, and much more, is already encrypted with 256-bit AES encryption for safekeeping away from prying eyes. However, I now have a means of creating an encrypted volume in both Linux and Windows where I can store all my files & folders that I don’t want anyone else to have access to in the event they are able to hack my systems. I use KeePassX 0.4.3 to store the password used to open my TrueCrypt volumes.
TrueCrypt 7.1a can be used to encrypt files and folders on the fly into an encrypted file, which acts like an encrypted volume on the system and can be mounted and unmounted as needed. The TrueCrypt volume file cannot be mounted (and thus its contents exposed) without the password that created it. Files and folders that are dropped onto the TrueCrypt volume are automatically encrypted and when the volume is unmounted, these files & folders remain encrypted and away from view. When the TrueCrypt volume is once again mounted on the system, files and folders that you double-click on to open are automatically decrypted on the fly so that they can be read and modified by the user. Another method for encryption that TrueCrypt will offer is partition encryption. This can be a non-system partition or an active system partition that can be the entire drive. Therefore, TrueCrypt will also give the user the ability to setup whole-disk encryption. This is particularly nice if you own a laptop and want to be able to protect the contents of that laptop if it is lost or stolen. In essence, anyone taking the laptop would have to know the password to gain access to and use the operating system on boot up.
For the purposes of this article, I am going to describe some of the basic features of TrueCrypt 7.1a for Linux and how to go about setting up and mounting an encrypted volume that is actually a file. This file can actually be moved or deleted like any other file on your system.
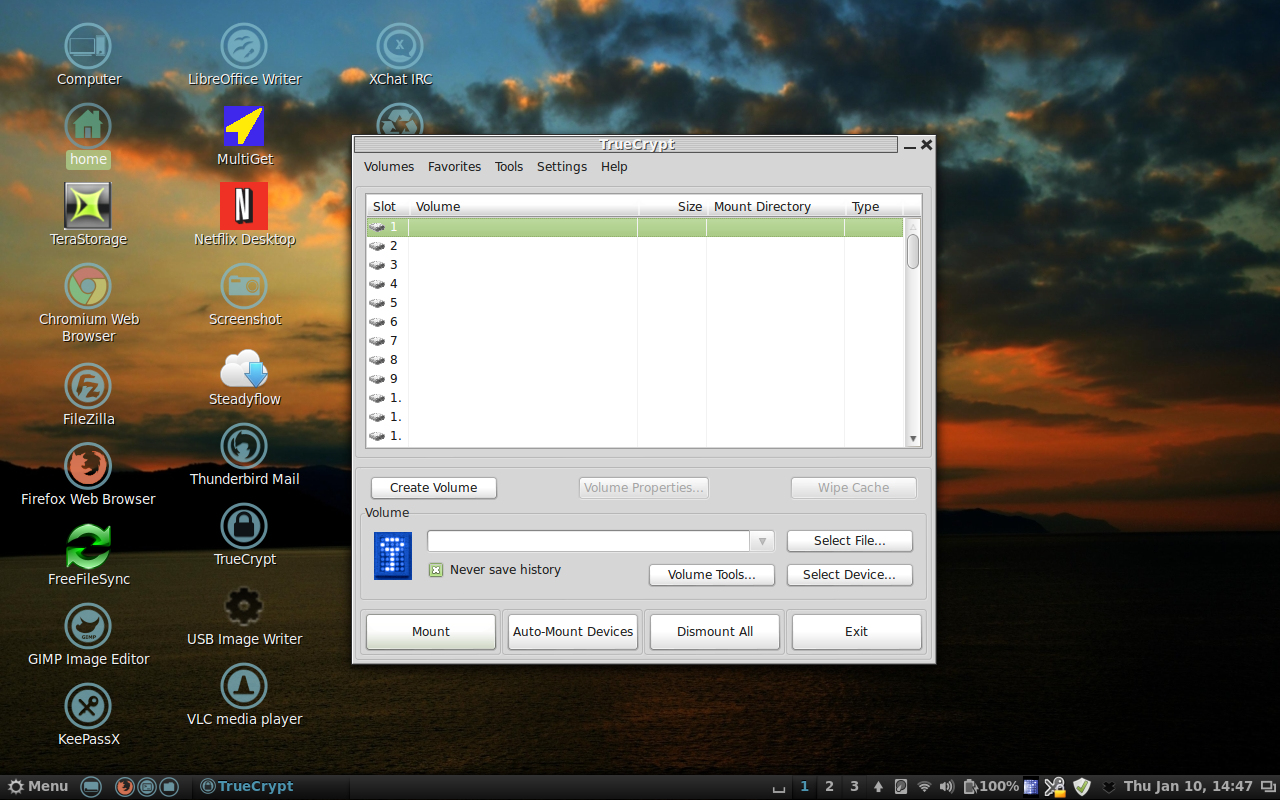 As I said earlier, I’m running Linux Mint 14 Cinnamon, which is a distribution based on Ubuntu and Debian Linux, codenamed Nadia. To install TrueCrypt in Linux, I surfed to the TrueCrypt Homepage and selected the .tar.gz file for download under the Linux section. If you were running a Windows or Mac platform OS, then you would use the appropriate sections for these instead. After downloading the .tar.gz file, I unzipped the tarball and extracted and installed the setup file. This then allowed me to place a symbolic link (shortcut to the application in Linux-speak) to the Desktop. Opening the application on the desktop revealed the screenshot that you see here. Notice that since I am using Linux and this operating system uses hierarchical folders rather than drive letters, there are no logical drive letters showing in the main window. If you were using MS Windows, then these logical drive letters would be visible.
 The first step in creating your encrypted volume in Linux is to select the Create Volume button. This will start the Volume Creation Wizard, which will guide you through the rest of the process. Take a look at the next screenshot that illustrates what I’m referring to. By clicking Next, you will be taken to the sections for creating the Volume, selecting the type of volume you would like (I chose standard), giving the volume a name and a location, then creating a password for the volume that will be used to mount and unmount the volume. This password will be created after you tell TrueCrypt the type of encryption that you would like to use, the cipher hash that you want, and the randomization process that is selected using random movements of your mouse during and before the formatting of the volume itself. You also get the opportunity to choose the size that you would like to make the volume and whether you want it to be of fixed size or dynamic.
 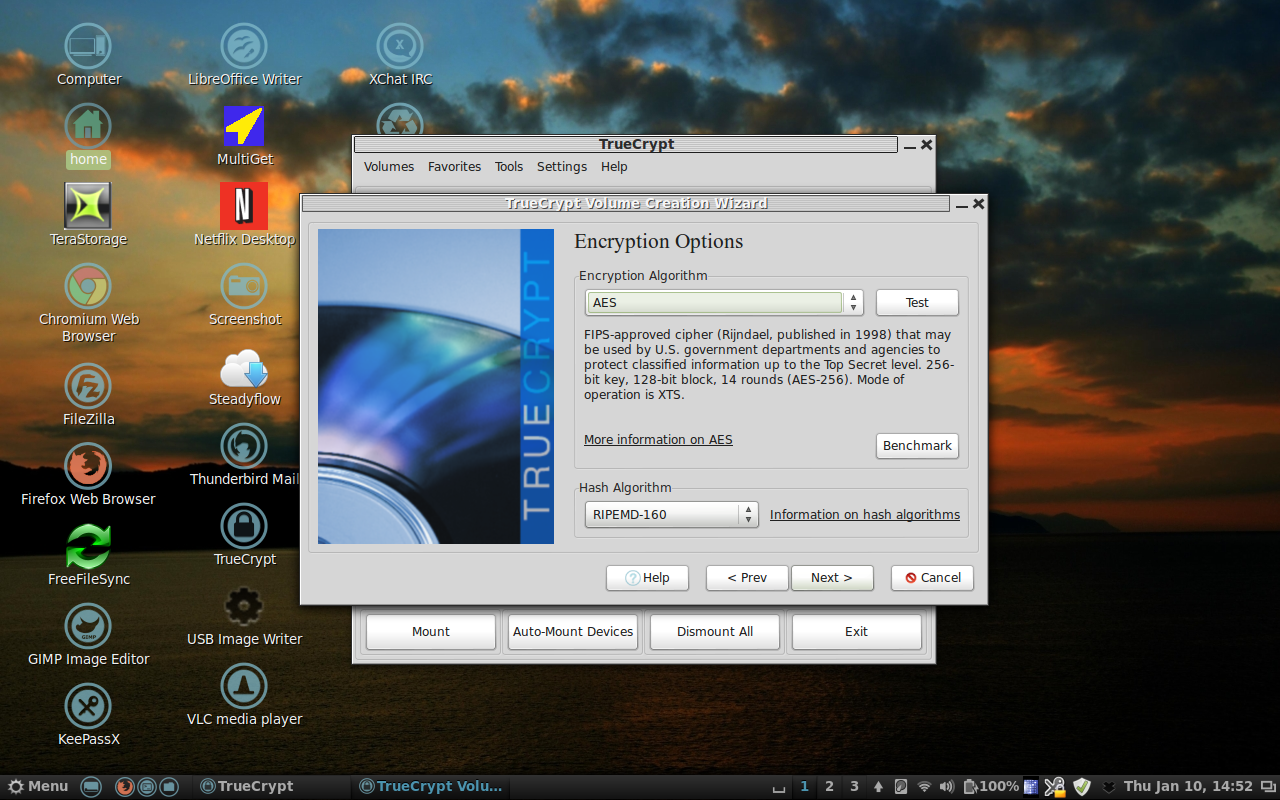 I chose for my volume that I called My_Encrypted_Files that the volume should be encrypted 256-bit with the default cipher hash and that the password I elected to use would be 30 characters in length consisting of upper- and lower-case letters, numbers, and special characters. This makes for an extremely difficult password to crack. If you elect to use the randomization of mouse cursor movements prior to formatting the volume, this significantly increases the encryption to the point of military-strength encryption used in top-secret classified documents. In addition to the TrueCrypt password, you’ll be prompted for your administrator password along the way as a means of authenticating you in that role in the volume creation process. In Linux, the administrator is referred to as Root or SuperUser, and you will need to type in that password in order to continue on with the process. In the next screenshot, the volume has been created. At this point, you’ll want to exit the application. Next, after the volume has
 been created, you’ll want to mount that volume in the system so that it can be accessed. This is accomplished by opening the TrueCrypt application, and selecting the file that was associated with the volume that you created earlier. Next, you would choose the Mount button. At this point, you are going to be asked for the password that TrueCrypt created for you to access the file and you will be asked for the administrator password to allow the system to authenticate you for that action. Once you have accomplished these two things. your volume will be mounte and ready to access and use. The user can then copy and paste files onto the mounted volume or simply drag and drop files on the the volume like you would any regular folder in Linux or drive in Windows. It’s very simple to use and files and folders that are placed in the encrypted volume are automatically encrypted on the fly. In my particular case, TrueCrypt called my encrypted volume, TrueCrypt1, and mounted that volume in location /dev/mapping/TrueCrypt1. If you’re using MS Windows, your volume will be mounted at the logical drive letter you chose to mount it.
So, for the best in data protection on your platform, download, install, and configure TrueCrypt 7.1a today. I think you’ll find like I did that this application and what it can do for you in the way of data protection on your laptop or desktop PC, or Mac will give you the peace of mind that you demand and deserve.
If you would like more detail on creating your first volume on your system, then go to the step-by-step tutorial for beginners using TrueCrypt 7.1a.
